Imagine transforming an intricate digital blueprint, perhaps for an exquisite piece of jewelry or a precise dental crown, into a tangible, solid metal object. This remarkable feat isn’t sorcery; it’s the sophisticated capability unlocked by 3D printing with advanced investment casting resin.
This innovative investable polymer stands as a cornerstone in modern additive manufacturing. Unlike standard resins, this specialized material is meticulously engineered to create models that undergo a complete, residue-free burnout, leaving behind an impeccably clean cavity within the investment. This process is indispensable for artisans, prosthodontists, and industrial engineers who demand the highest precision and efficiency in producing intricate metal components.
This comprehensive resource promises to elevate your expertise far beyond rudimentary applications. We will meticulously unpack critical strategies for troubleshooting castable resin prints, provide expert advice on optimizing investment casting resin burnout cycles, and delve into advanced techniques for investment casting resin to consistently achieve unparalleled metal casting results. Whether you are navigating common failures in castable resin printing as a novice or are an experienced practitioner seeking to refine your workflow, prepare to unlock a deeper understanding of mastering investment casting resin and achieve perfection in every pour.
What is Investment Casting Resin? The Magic Material
Castable Printing Resin represents a significant advancement in the realm of 3D printing, specifically tailored for the creation of intricate metal objects. Unlike standard resins designed for producing functional plastic parts, investment casting resin is a specialized photopolymer resin formulated with a unique purpose: to be completely eliminated at high temperatures without leaving any trace. This crucial characteristic makes it an indispensable component in the modern lost-wax casting process.
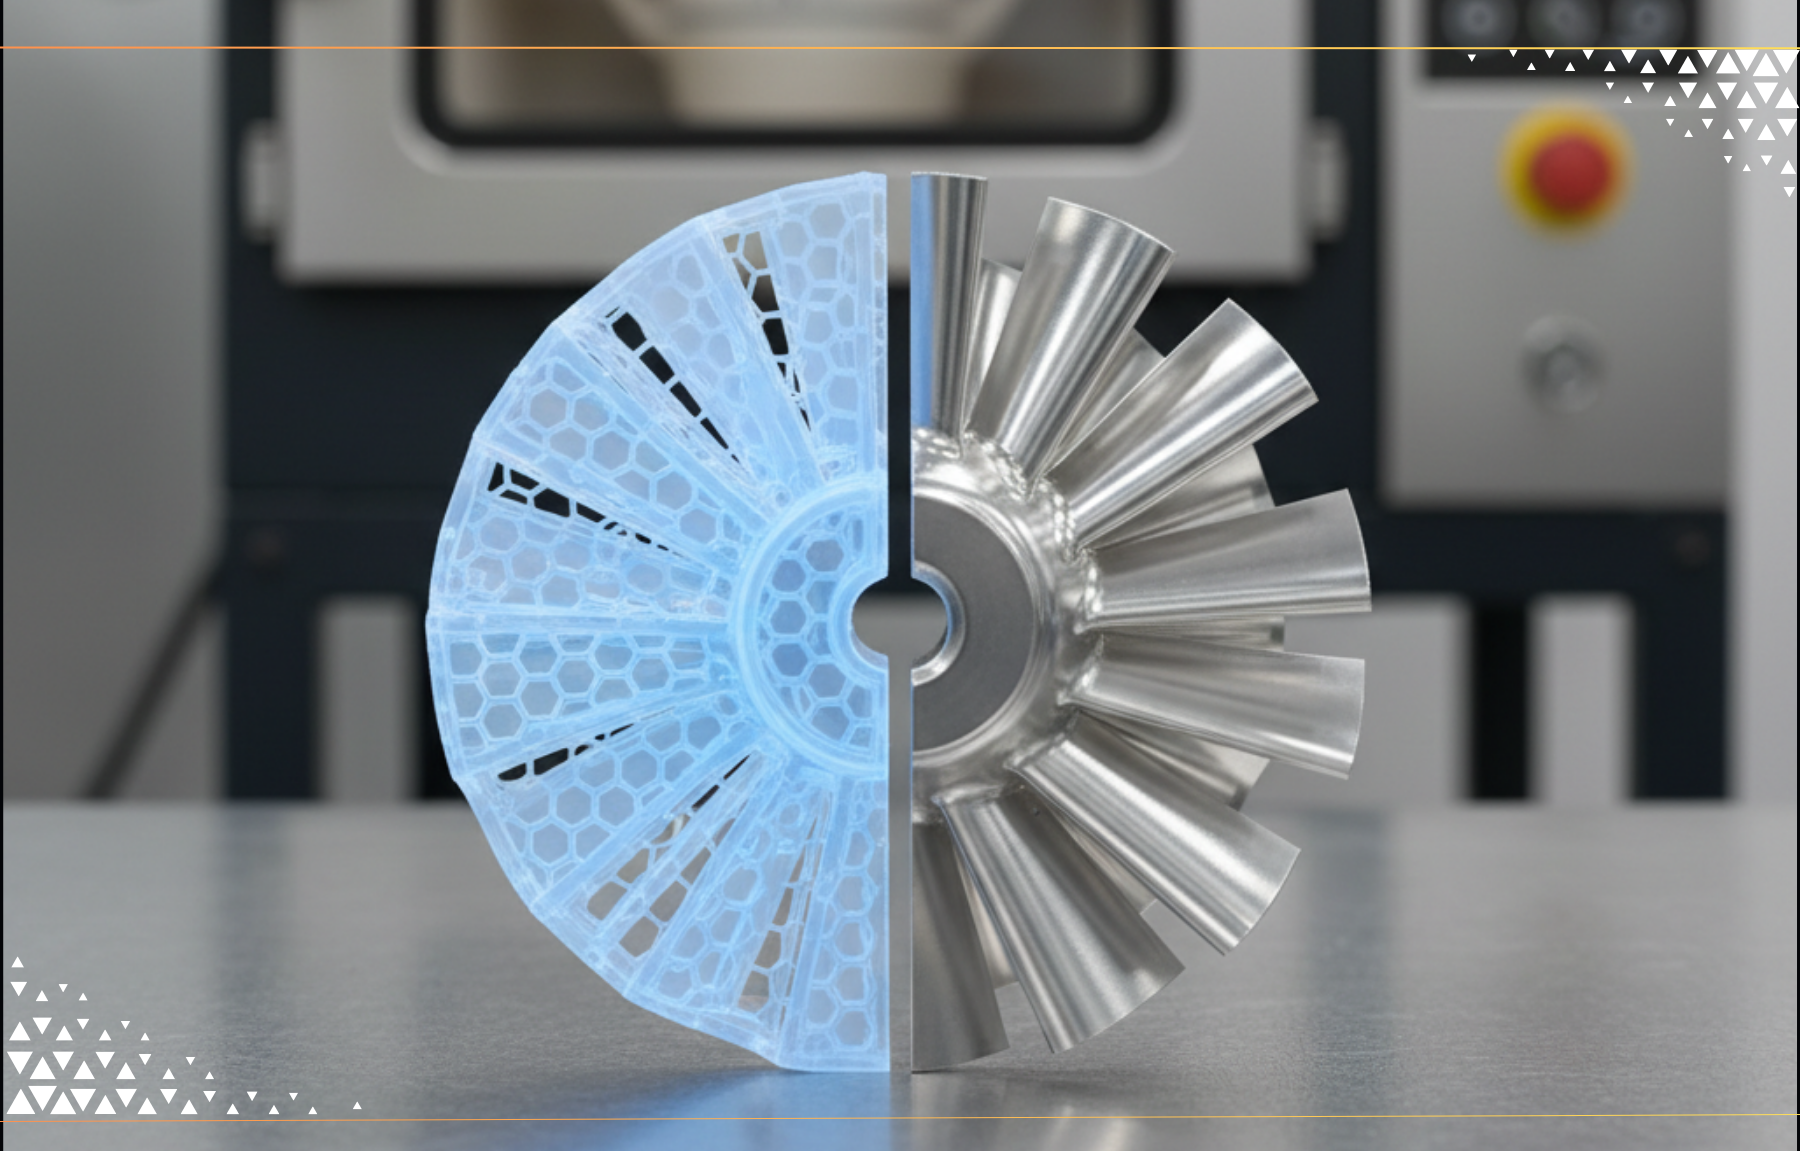
The fundamental principle behind Castable Printing Resin mirrors the ancient ‘lost wax’ method, but with a powerful digital upgrade. First, a highly detailed 3D model is brought to life using a resin-based 3D printer (such as SLA, DLP, or LCD technologies). This resin model, often referred to as a “pattern,” is then meticulously encased in a specialized plaster-like material known as investment. Once the investment cures, the entire assembly is placed into a high-temperature kiln. Here, the castable resin pattern undergoes a meticulous burnout process, completely vaporizing and leaving behind a perfectly clean, empty cavity within the hardened investment mold, ready to receive molten metal. For a deeper dive into this transformative material, explore our comprehensive guide on Castable SLA 3D Printing Resin.
The success of Castable Printing Resin hinges on several key properties. Foremost among these is its low ash content, which is absolutely critical. Any residual ash or carbon left within the mold cavity after burnout can lead to significant defects in the final metal casting, compromising surface finish and structural integrity. Closely related is its ability for clean burnout, meaning it decomposes almost entirely into gaseous byproducts, ensuring a pristine mold. Furthermore, these resins are renowned for their high detail resolution, capable of capturing the most intricate features and complex geometries that would be challenging, if not impossible, with traditional methods. Many formulations are also designed to exhibit wax-like characteristics, mimicking the thermal expansion and handling properties of traditional casting waxes to integrate smoothly into existing casting workflows.
It’s vital to distinguish investment casting resin from standard 3D printing resins. Standard resins are engineered to create durable, end-use plastic components with specific mechanical properties. In contrast, castable resins are not intended for final plastic parts; their sole purpose is to serve as a sacrificial pattern that vanishes, paving the way for metal. From a technical standpoint, the magic happens through photopolymerization, where liquid resin is selectively cured layer by layer by UV light. The specific chemical composition of the resin dictates not only its mechanical properties during printing but, more importantly, its unique burnout characteristics, ensuring a flawless transition from resin pattern to metal casting.
Why Choose investment casting resin? Unlocking Design Freedom
The adoption of investment casting resin by jewelers, dentists, and industrial designers is driven by its unparalleled ability to liberate creativity and streamline production. This specialized material redefines what’s possible in investment casting, offering a suite of benefits that traditional methods struggle to match.
One of the most compelling advantages is the ability to produce intricate and complex designs. Castable Printing Resin enables the creation of geometries, undercuts, and delicate features that would be impossible or exceedingly difficult to achieve through traditional wax carving, machining, or other manual processes. This empowers designers to push the boundaries of artistic expression and engineering innovation.
Beyond design freedom, Castable Printing Resin offers significant gains in speed and efficiency. Rapid prototyping cycles allow for quick design iterations, letting manufacturers refine concepts faster than ever before. Furthermore, modern resin 3D printers can produce multiple patterns simultaneously, drastically accelerating production timelines compared to labor-intensive manual methods. This efficiency is critical for businesses operating in dynamic markets, including those utilizing advanced services like 3D printing Los Angeles offers.
Accuracy and repeatability are hallmarks of digital manufacturing with castable resins. Since patterns are generated directly from digital models, each print is consistent and boasts high precision, which is vital for batch production and ensuring uniform quality across a product line. For complex pieces, this digital approach also often translates to cost-effectiveness, as it can be significantly more economical than relying on highly skilled manual labor, particularly for intricate or mass-produced items.
The applications for Castable Printing Resin are diverse and impactful. In jewelry, it’s a game-changer for creating custom rings, pendants, earrings, bracelets, and other pieces featuring ultra-fine details, filigree work, or precise pavé settings. The dental industry leverages it for casting dental crowns, bridges, partial frameworks, and various other prosthetics (it’s important to note that while the resin creates the pattern, the final metal part is what goes into the mouth, often requiring specialized metals like those processed by a Copper metal 3d printer). In industrial settings, it’s used for small, complex components, prototypes, and limited-run production of specialized metal parts where high precision is paramount.
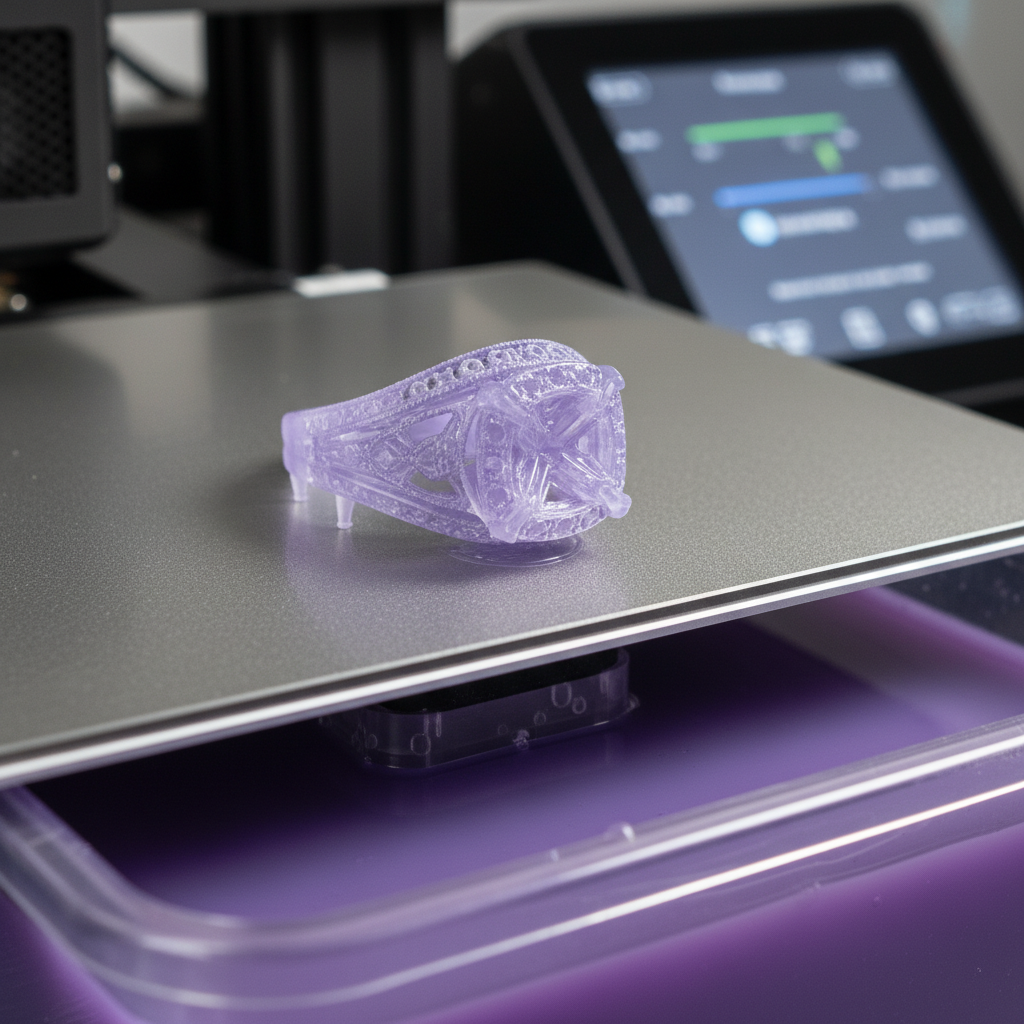
Consider a real-world scenario: a custom jeweler needs to produce a unique engagement ring with an intricate, vintage-inspired filigree design interwoven with tiny gem settings. Hand-carving such a piece would be prohibitively time-consuming, expensive, and difficult to reproduce accurately. By using Castable Printing Resin, the jeweler can design the ring digitally, print the pattern overnight, and then cast it in precious metal, achieving a level of detail and perfection that would be nearly impossible otherwise.
The Printing Process: Setting the Stage for Success
Achieving exceptional results with investment casting resin begins long before the molten metal ever touches the mold. The meticulous preparation and execution of the 3D printing process itself are foundational for a successful casting. Castable Printing Resin is predominantly used with resin-based 3D printers that employ light to cure liquid photopolymer, including Stereolithography (SLA), Digital Light Processing (DLP), and LCD/MSLA technologies. When choosing a printer, consider factors discussed in our guide on Choosing the Right SLA 3D Printer.
Critical pre-print considerations lay the groundwork for a flawless print. Within the slicing software, model preparation is paramount. Orientation of the model on the build plate should be strategic, aiming to minimize visible layer lines on critical surfaces, reduce the overall need for support structures, and facilitate efficient resin drainage. For larger models, hollowing can significantly conserve resin and reduce the amount of material that needs to burn out during casting. However, hollowing necessitates the inclusion of strategically placed drain holes to allow uncured resin to escape during the washing stage and, more importantly, to prevent the investment mold from cracking due to internal pressure build-up during burnout.
Support generation is another vital step. Supports must be placed strategically on less critical surfaces or areas that are easy to clean up post-print, avoiding dense networks on intricate features that could lead to damage during removal. Both the density and thickness of supports need to be sufficient to prevent warping and sagging of the print without making their removal overly difficult. Research indicates that optimal print orientation and support placement can reduce post-processing time by up to 30% and significantly improve the final surface quality, especially for intricate geometries, making this step crucial for efficiency and quality.
Finally, adhering to the manufacturer’s specific resin settings is non-negotiable. These include exposure time, layer height, lift speed, and retraction speed, all of which are precisely calibrated for each unique resin formulation and printer model combination. Deviating from these guidelines can lead to print failures and compromised patterns.
Once printing is complete, post-processing is the next crucial phase. Washing involves thoroughly cleaning all excess uncured resin from the print using isopropyl alcohol (IPA) or a resin-specific cleaner. For hollow parts, ensuring all internal channels are flushed completely is vital to prevent later issues. The subsequent step, post-curing, is absolutely critical. This process, typically performed in a dedicated UV curing station or under controlled natural sunlight, ensures the resin achieves its final mechanical properties and, more importantly, enables a complete, ash-free burnout. Inadequate post-curing is a leading cause of issues during the burnout phase, creating carbon residue and affecting the final metal casting.
Throughout this entire process, safety precautions must be strictly observed. Always wear appropriate Personal Protective Equipment (PPE), including gloves and eye protection, when handling liquid resin and uncured prints. Work in a well-ventilated area to avoid inhaling resin fumes, ensuring a safe and healthy working environment.
Common Failures in investment casting resin: Troubleshooting Your Way to Perfection
Even with the best equipment and highest quality Castable Printing Resin, issues can arise. Understanding common failures in castable resin printing and knowing how to troubleshoot them is essential for consistently successful results. Identifying and addressing these problems early in the printing stage can prevent costly mistakes in the subsequent casting process.
Problem 1: Print Failures These manifest as the print failing to adhere to the build plate, partial prints, missing layers, or the entire print detaching during the printing process.
- Causes: Often, these issues stem from insufficient supports, leading to parts detaching or distorting. Incorrect exposure settings (typically under-exposure) mean the resin isn’t curing adequately to form strong layers. Cold resin also increases viscosity, making it harder for the printer to create accurate layers. A dirty or improperly leveled build plate can prevent initial adhesion, while a worn FEP film can cause suction issues.
- Solutions: Increase the number of support contact points or their thickness. Calibrate your exposure time using exposure calibration prints to dial in the perfect setting for your resin and printer. Ensure your resin is at room temperature (ideally 20-25°C). Always clean and re-level the build plate before each print. Regularly inspect and replace the FEP film as needed.
Problem 2: Poor Surface Quality This includes rough surfaces, visible layer lines, ‘blobs’ or ‘artifacts’, and pitting on the print.
- Causes: Over-exposure is a common culprit, causing light to bleed beyond the intended layer, resulting in rough textures. Dirty or contaminated resin can lead to imperfections. Incorrect print orientation may exacerbate layer lines. A lift speed that is too high can cause layer separation, while a worn FEP film or damaged LCD screen (e.g., dead pixels) can also degrade print quality.
- Solutions: Slightly reduce your exposure time. Filter your resin for any debris or switch to fresh resin if contamination is suspected. Re-orient the model to place critical surfaces away from supports or where layer lines are less prominent. Decrease the lift speed to allow layers to separate more gently. Inspect and replace the FEP film or check your LCD screen for any defects.
Problem 3: Distorted or Shrunken Prints The final print doesn’t match the intended dimensions or has noticeable warpage.
- Causes: Inadequate post-curing is a primary reason, leading to inconsistent material properties and continued polymerization after printing, which can induce shrinkage or distortion. Too few or poorly placed supports can allow the print to sag or warp under its own weight or during the printing process. Excessive thermal stress during printing or curing can also contribute. Research indicates that different
Castable Printing Resintypes exhibit varying shrinkage rates during post-curing and burnout, necessitating precise compensation in design. For instance, Resin X might shrink by 0.5-0.7%, while Resin Y could shrink by 0.8-1.0%. Understanding your resin’s specific shrinkage is crucial for accurate dimensioning. - Solutions: Ensure prints are fully post-cured according to the resin manufacturer’s recommendations for both time and UV intensity. Add more and strategically placed supports to critical areas. Maintain a stable ambient temperature around the printer and during the curing process to minimize thermal fluctuations.
Problem 4: Ash or Residue After Burnout While this problem manifests during the burnout stage, its root causes often lie in the initial resin printing and post-processing steps.
- Causes: The most common cause is incomplete post-curing, which leaves residual unreacted monomers in the print. These unreacted chemicals can carbonize rather than fully decompose during burnout. Using incorrect resin settings (e.g., under-exposure) can also contribute to unreacted resin. Resin contamination with dust or debris can also lead to small pockets of non-combustible material.
- Solutions: Verify and extend your post-curing times and intensity to ensure complete polymerization. Always use the manufacturer’s recommended print profiles for your specific Castable Printing Resin. Keep resin bottles sealed and workspaces clean to prevent dust or debris contamination. Addressing these issues in the printing phase is crucial to prevent problems in the critical burnout stage, which will be covered in detail next.
Section 5: Optimizing Castable Resin Burnout: The Heart of the Casting Process
The journey of transforming a digital design into a tangible metal object hinges significantly on the burnout process. This isn’t merely about burning away the resin; it’s a meticulously choreographed thermal dance designed to eliminate the resin pattern entirely, leaving behind a pristine cavity within the investment mold. The ultimate goal is a perfectly clean void, free from ash or carbon, that will faithfully capture the molten metal’s intricate details without compromise. Achieving this ‘perfect burnout’ is paramount for ensuring high-quality, defect-free castings.
The success of optimizing castable resin burnout is dictated by several critical factors, primarily the burnout schedule. The initial heating phase is perhaps the most sensitive. Resin patterns, unlike traditional waxes, exhibit different thermal expansion characteristics. A rapid temperature increase can cause the resin to expand too quickly, exerting immense pressure on the fragile investment mold, inevitably leading to cracking. Research underscores that a slow, controlled ramp-up in these early stages significantly reduces thermal shock and preserves the integrity of the investment, directly translating to superior casting quality. For instance, increasing the temperature from ambient to roughly 150-250°C (300-480°F) at a modest rate of 50-100°C per hour, often with a holding period, is a recommended practice.
Following this, strategic hold times are integrated into the burnout schedule. A mid-range hold, typically between 250-450°C (480-840°F) for 2-4 hours, allows the resin to decompose into gaseous byproducts and carbon. This is then followed by a higher temperature hold, around 650-750°C (1200-1380°F), also for 2-4 hours, which is crucial for oxidizing any residual carbon into carbon dioxide. Adequate oxygen flow during this phase is absolutely non-negotiable; insufficient ventilation will lead to tenacious carbon residue. Finally, the kiln reaches its peak temperature, usually between 700-850°C (1290-1560°F), based on the metal being cast, ensuring complete incineration and preparing the mold for the molten material. A gradual cool-down to the specific casting temperature for the chosen metal prevents further thermal shock.
Proper kiln ventilation is not just a recommendation, it’s a requirement. The efficient removal of resin fumes is vital, as it allows fresh oxygen to enter the chamber, facilitating the complete combustion and removal of carbon. Stagnant air inside the kiln is a primary contributor to ash residue. Beyond temperature control, the choice of investment material itself plays a significant role. High-quality, fine-grain investment specifically engineered for resin patterns is crucial due to the distinct thermal expansion properties of these resins compared to waxes. Correct flask loading, with adequate air circulation and sprues oriented downwards, further aids in a clean burnout.
When failures occur, such as investment cracking, the root cause often traces back to overly rapid heating or an improper water-to-powder ratio during investment mixing. Addressing these requires adherence to slower ramp rates and precise mixing. Carbon residue in the cavity usually indicates insufficient hold times at key decomposition stages, poor ventilation, or even inadequate post-curing of the initial resin print. Correcting this involves extending hold times, verifying kiln airflow, and ensuring thorough post-curing. Surface defects in the final casting, like pitting or ‘orange peel’ texture, often signal incomplete burnout or investment breakdown. For truly advanced techniques for investment casting resin, some industrial setups employ controlled atmosphere kilns or exhaust gas monitoring to achieve unparalleled burnout precision. Developing resin-specific burnout profiles is also a sophisticated approach to ensure optimal outcomes for different material combinations.
Section 6: Advanced Techniques for Investment Casting Resin: Pushing the Boundaries
Moving beyond standard applications, advanced techniques for investment casting resin open up new avenues for design and production. One such method is multi-material casting, which involves combining castable resin patterns with traditional wax patterns on a single casting tree. This approach offers a compelling blend of cost-effectiveness and design freedom, allowing jewelers or manufacturers to leverage the resin’s high detail capabilities for intricate components while using less expensive wax for simpler, bulkier elements. However, careful consideration of the thermal expansion differences between resin and wax is paramount, and the burnout schedule must be tailored to accommodate both materials, often prioritizing the more sensitive resin.
For designs exceeding the build volume of a typical resin printer, or for optimizing print quality across different features, complex assemblies and sectional printing present a powerful solution. This involves printing an intricate or large design in multiple resin sections and then meticulously assembling them before encasing them in investment. Techniques for joining these sections range from specialized resin-based adhesives to applying liquid resin to seams and curing it with a UV pen, effectively ‘welding’ the pieces together. The challenge lies in achieving perfect alignment and ensuring that the joining material also burns out cleanly without any residual ash or distortion.
Direct investment casting of particularly large or heavy resin prints demands specialized strategies to manage the significant thermal stress they induce during burnout. Here, aggressive hollowing of the resin pattern, complete with well-placed drain holes, becomes even more critical to reduce the volume of material that needs to expand and decompose. Some casters also employ ‘staged’ investments, using a coarser core investment for bulk and a finer, detail-capturing investment for the pattern’s surface, or specific investment powders formulated with higher expansion coefficients to better withstand the thermal stresses from dense resin patterns.
A deeper understanding of material science significantly elevates the outcomes with Castable Printing Resin. The specific chemical formulation of a resin, whether acrylic or urethane-based, profoundly impacts its burnout properties, ash content, and potential reactivity with various metal alloys. Savvy manufacturers and jewelers recognize that not all resins are created equal; some brands offer resins specifically optimized for particular metals, such as those designed for platinum casting, which require higher temperature resistance and exceptionally clean burnout profiles to prevent issues like investment shell. The future of castable resins points towards formulations with integrated burnout modifiers or more active decomposition agents, further enhancing reliability and reducing the potential for residue.
Section 7: Post-Processing and Finishing: Bringing Your Vision to Life
The moment a cast piece emerges from the investment mold, the journey from digital design to metal reality isn’t over. Post-casting procedures are essential to transform the raw casting into a finished, polished product. The initial step is divesting, where the investment mold is safely removed from the cast metal. This often involves quenching the hot flask in water, which helps to break down the investment, or using specialized vibratory divesting equipment. Extreme care must be exercised during this phase to avoid damaging the often delicate, freshly cast metal.
Following divesting, the sprues—the channels through which molten metal flowed into the mold—must be carefully removed. This is typically done with appropriate cutting tools, such as a jeweler’s saw or specialized snips, followed by meticulous grinding and filing to eliminate any remaining nubs or marks. The subsequent finishing stages are where the true artistry takes over, encompassing a range of processes like sanding with progressively finer grits, extensive filing, polishing to achieve the desired luster, tumbling for surface uniformity, and potentially intricate gem setting or other specialized surface treatments.
Even with meticulous attention during the printing and burnout phases, certain challenges can arise in the casting itself, often stemming directly from issues upstream. Porosity, characterized by small holes or bubbles within the metal, is a common concern. This can be caused by gas entrapment during casting, insufficient vacuum, incorrect metal temperature, or even investment breakdown due to an imperfect burnout. Prevention hinges on ensuring proper vacuum or pressure during casting, maintaining optimal metal temperature, thoroughly degassing the molten metal, and, critically, a flawless burnout using a high-quality investment.
Surface imperfections, such as roughness, pitting, or an undesirable ‘orange peel’ texture on the metal, also frequently trace back to issues like incomplete burnout, investment degradation, or problems with the casting machine itself. Resolving these necessitates revisiting and refining the burnout schedule, ensuring the mold is at the correct temperature prior to casting, and working with clean, uncontaminated metal. Rigorous quality control, involving meticulous inspection of the cast part for any defects, verifying dimensional accuracy against the original CAD model, and assessing the overall surface finish, is an indispensable step before proceeding to the final finishing processes.
Section 8: Choosing the Right Castable Resin for Your Project
Selecting the appropriate Castable Printing Resin is a pivotal decision that directly influences print success, burnout quality, and the final metal casting. This choice goes beyond simply picking a resin; it involves a nuanced evaluation of several interdependent factors tailored to your specific project and equipment.
Foremost, printer compatibility is non-negotiable. Ensure the resin’s wavelength (e.g., 405nm) precisely matches your 3D printer’s light source. The characteristics of your printer also matter, for example, considerations when choosing the right SLA 3D printer will affect what resins perform best. Secondly, consider the desired level of detail and surface finish. Some resins are engineered for producing ultra-fine features crucial for intricate jewelry, while others prioritize smoother surfaces for larger models. Examining manufacturer specifications and reviewing sample prints is highly advisable.
Crucially, the specific metal you intend to cast is a primary determinant. Different metal alloys, such as gold, silver, brass, bronze, or platinum, possess distinct casting temperatures and can react differently to any minute residue left after burnout. Therefore, selecting a resin explicitly formulated and optimized for your target metal alloy is paramount to prevent issues like porosity or surface defects in the final casting. Understand the resin’s recommended burnout temperature and schedule, and verify its compatibility with your kiln’s capabilities and your chosen investment material.
Beyond performance, practical considerations like cost-effectiveness and consistent availability are important, especially for production environments. Finally, evaluate the ease of post-processing; some resins are easier to wash and cure, while others might be more brittle or flexible after printing, impacting handling. Reputable resin manufacturers often specialize in different niches. For instance, some excel in resins for fine jewelry due to their exceptional detail and clean burnout, while others might focus on dental applications requiring biocompatible options for indirect casting or industrial uses demanding specific mechanical properties before burnout. Regardless of the brand or application, always conduct small test batches when trying a new castable resin or a new resin-investment combination. This empirical validation of your processes is the surest way to guarantee success before committing to full-scale production.
Conclusion: Mastering the Art of Metal Casting with investment casting resin
The intricate world of investment casting, empowered by advanced materials, has been thoroughly explored. From the fundamental principles to the advanced techniques that define successful metal casting, we have navigated the complexities of crafting resin patterns. The nuances of troubleshooting intricate prints, optimizing burnout cycles for flawless results, and employing advanced techniques for investment casting resin are now clearly understood, dispelling the challenges of common failures in castable resin printing.
This innovative material decisively offers unprecedented design freedom, revolutionizing industries like jewelry and dentistry. It allows for the creation of previously impossible geometries with consistent quality, establishing a new benchmark for precision and efficiency in metal fabrication. Indeed, the competitive advantage gained through its application is undeniable.
While achieving perfection demands precision, patience, and a keen understanding of both 3D printing and investment casting principles, the rewards are immense. This comprehensive guide has equipped you with the expert insights and practical solutions necessary to overcome hurdles and achieve consistently stunning metal castings. You are now empowered with the knowledge to translate complex digital models into flawless physical realities.
Now, armed with this definitive expertise, the path forward is clear. It is time to embrace the power of castable printing resin to transform your most intricate designs into tangible, high-quality metal realities. Your mastery of this material unlocks a new era of creative possibilities in metal fabrication, inviting you to experiment, refine, and truly innovate.
Frequently Asked Questions
What exactly makes castable resin “castable” compared to other 3D printing resins?
Investment casting resin is specifically formulated to behave like traditional wax patterns during the investment casting process. Unlike standard resins, which create durable plastic parts, castable resins are designed to burn away cleanly and completely at high temperatures, leaving minimal to zero ash or residue in the mold cavity. This clean burnout is paramount for producing defect-free metal castings. Standard resins, in contrast, would leave behind plastic residue, ruining the metal casting.
Why is thorough post-curing so crucial for castable resin prints before investing?
Post-curing is an essential step for Castable Printing Resin because it completes the photopolymerization process, fully solidifying the resin pattern. If a print is not adequately post-cured, it will contain unreacted monomers and polymers that will not burn out cleanly during the kiln cycle. This leads to carbon residue or ash being left in the investment mold, which in turn causes defects, porosity, or rough surfaces in the final metal casting. Proper post-curing ensures the resin decomposes effectively and completely.
What are the most common causes of troubleshooting castable resin prints during the printing stage, like failed prints or poor surface quality?
Common print failures in investment casting resin often stem from:
- Insufficient supports: Leading to prints detaching or warping. Solution: Increase support density, thickness, and contact points, especially on overhangs.
- Incorrect exposure settings: Under-exposure causes weak layers or detachment; over-exposure leads to loss of detail and brittleness. Solution: Calibrate exposure using test prints and follow manufacturer guidelines.
- Temperature issues: Cold resin is too viscous, leading to print failures. Solution: Ensure resin is at room temperature (20-25°C).
- Poor build plate adhesion: Dirty or improperly leveled build plate. Solution: Thoroughly clean and re-level the build plate regularly.
- FEP film issues: Worn, damaged, or cloudy FEP film can cause print failures or poor surface quality. Solution: Inspect and replace the FEP film as needed.
How do I prevent the investment mold from cracking during optimizing castable resin burnout?
Preventing investment cracking is a critical part of optimizing castable resin burnout. The primary cause is thermal shock from the resin expanding too quickly before decomposition. To avoid this:
- Implement a slow ramp-up: Begin with a slow, controlled heating phase (e.g., 50-100°C per hour) from room temperature up to about 250°C.
- Use hold times: Include a hold time at this initial lower temperature to allow the resin to gently melt and decompose before significant expansion.
- Proper spruing: Ensure your patterns are correctly sprued and vented to allow expanding gases and resin byproducts to escape without building up pressure.
- Correct water-to-powder ratio: Always follow the investment manufacturer’s precise instructions for mixing, as an incorrect ratio can weaken the mold.
- Quality investment: Use a high-quality investment powder specifically designed for resin patterns, as they are formulated to withstand the unique thermal expansion characteristics of resin.
Are there advanced techniques for investment casting resin to successfully cast very large or complex resin patterns?
Yes, several advanced techniques for investment casting resin can help with challenging patterns:
- Hollowing with drain holes: For large or dense patterns, hollowing the model in your slicing software significantly reduces the amount of resin to burn out, minimizing thermal expansion stress. Crucially, always include sufficient drain holes to allow uncured resin to escape during washing and expanding gases to exit during burnout.
- Sectional printing and assembly: Print very large or intricate designs in multiple smaller sections, optimizing the print orientation for each part, and then assemble them before investing. Joins can be made with specialized resin adhesives or by applying fresh resin and UV-curing it with a UV pen.
- Specialized investment types: Consider investment powders formulated with higher expansion characteristics or specific binder systems designed to better accommodate the challenges of large resin patterns, preventing cracking and ensuring a clean cavity.
How can I identify if there is carbon residue or ash left in the mold cavity after burnout, and what causes it?
After burnout, signs of carbon residue or ash in the mold cavity include dark grey or black spots, a rough or textured surface, or a pitted appearance within the casting. When you divested your metal casting, the surface may appear dull, pitted, or have a crusty black layer. The primary causes are:
- Incomplete post-curing: The most common culprit. Residual unreacted resin will not burn out cleanly.
- Insufficient hold time or temperature: The burnout schedule did not allow enough time at the decomposition or carbon oxidation phases.
- Poor kiln ventilation: Lack of oxygen prevents complete combustion of carbon. Ensure your kiln has adequate airflow, possibly cracking the door slightly during the carbon removal phase (around 650-750°C) if safe and recommended by your kiln manufacturer.
Is a universal burnout schedule suitable for all investment casting resin types and metal alloys, or do I need specific profiles?
A universal burnout schedule is generally NOT suitable for all Castable Printing Resin types or metal alloys. Each resin brand and even different formulations from the same brand can have unique thermal decomposition properties, requiring specific ramp rates and hold times. Similarly, the metal alloy being cast dictates the final mold temperature. Platinum casting, for example, requires a much higher mold temperature than silver or gold. It’s crucial to consult the resin manufacturer’s recommended burnout schedule and adapt it based on your specific investment powder and the metal you are casting. Always perform test burns when trying a new resin or a new resin/investment combination.
What key factors should I consider when choosing the right Castable Printing Resin for my specific casting project?
Choosing the correct Castable Printing Resin is crucial for success. Key factors include:
- Printer Compatibility: Ensure the resin’s wavelength (e.g., 405nm) matches your 3D printer’s light source.
- Desired Detail & Surface Finish: Some resins excel at ultra-fine details for intricate jewelry, while others prioritize smoother surfaces for dental applications.
- Metal Being Cast: This is paramount. Select a resin specifically formulated and tested for the metal alloy you intend to cast (e.g., gold, silver, brass, platinum). Different metals have varying casting temperatures and react differently to residual ash.
- Recommended Burnout Schedule: Understand the resin’s required burnout profile and ensure it is compatible with your kiln’s capabilities and your chosen investment.
- Cost & Availability: Balance performance with your budget and ensure consistent supply, especially for production needs.
- Ease of Post-Processing: Consider how easily the resin washes, its post-curing requirements, and its handling characteristics (e.g., brittleness after curing).