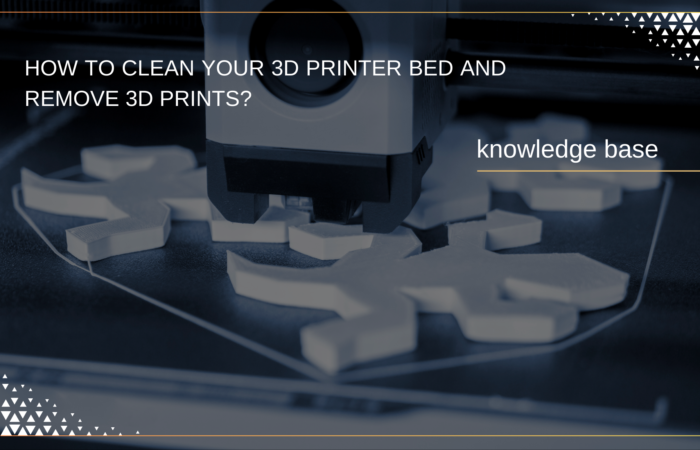
How To Clean Your 3D Printer Bed And Remove 3D Prints?
- Why Clean Your 3D Printer Bed?
- Understanding The Different Bed Types And Materials
- When Should You Clean Your 3D Printer Bed?
- How To Clean 3D Printer Bed In 7 Steps?
- Best Practices To Prevent Build-Up And Improve Adhesion
- Keep Your 3D Printer
- Performing At Its Best With A Clean Bed
-
On-Demand Thermoplastic 3D Printing for Industrial Applications
Affordable and versatile 3D printing for prototypes, functional parts, and end-use plastic components.

-
Bambu Lab X1E 3D Printer
For professionals and engineering applications.
-
Technology:
FFF
-
Materials:
Plastic Filaments

-
Technology:
Why Clean Your 3D Printer Bed?
A clean printer bed is essential for proper adhesion—without it, your prints can lift, warp, or fail altogether. Dust, grease, and leftover material residues can interfere with adhesion, causing the print to come loose mid-process. This not only wastes time and materials but also leads to poor print quality.
At Additive Plus, we work with top-tier materials like LPBF Powders, Metal Powders, and carbon fiber FFF, all of which require a pristine surface for optimal results. The right cleaning routine helps ensure that your prints stick, even with challenging materials or intricate designs.
Here’s why cleaning your 3D bed regularly is worth it:
- Improves adhesion: Ensures a strong bond between your material and the bed surface.
- Prevents warping: Reduces the risk of shifting or lifting as the print cools.
- Enhances print quality: Creates smooth, flawless prints with better detail.
- Saves time and material: Prevents failed prints that can lead to wasted resources.
A simple cleaning can make all the difference in your 3D printing process.
Read related articles:
Understanding The Different Bed Types And Materials
| Material | Advantages | Considerations |
| Glass | Smooth surface, excellent adhesion with the right adhesive, easy to clean. | Prone to cracking under stress. |
| Aluminum | Lightweight, durable, heats up quickly and evenly. | Requires more frequent cleaning to maintain adhesion, especially with high-temperature materials. |
| Polyetherimide (PEI) | Strong, durable surface, works well for various filaments (ABS, Nylon), resistant to scratching. | Sensitive to cleaning solutions, requires careful handling. |
| Spring Steel | Flexible, easy to remove prints from, ideal for large-scale production. | Needs cleaning after every print to maintain surface quality. |
| Powder-coated Surfaces | Rougher surface promotes better adhesion for filaments like metal or carbon fiber. | Requires precise cleaning to avoid damaging the coating. |
Why the Bed Material Matters
Different materials respond differently to various types of filaments. For example, while glass may work well with PLA, it may require additional adhesion aids for ABS or TPU. Similarly, more rigid materials like metals or carbon fibers can sometimes cause more wear on the surface, requiring specific cleaning techniques to preserve the bed’s performance.
Adhesion Challenges
Understanding how different materials interact with filaments is crucial for a successful cleaning regimen. For instance, ABS can warp and shrink, affecting adhesion on a glass or aluminum bed. Flexible filaments like TPU might require more delicate handling to prevent damaging the bed or leaving behind residue. Identifying these challenges will help you decide the best cleaning methods to ensure consistent adhesion and high-quality prints every time.
When Should You Clean Your 3D Printer Bed?
Keeping track of when to clean your 3D printer bed is essential for maintaining optimal adhesion and print quality. Regular cleaning prevents residue build-up, adhesion issues, and unnecessary wear on your bed. Below are key indicators to watch for and frequency guidelines for cleaning based on your printing habits.
Indicators for Cleaning
- Residue Build-up: Adhesive or filament residue can accumulate after multiple prints. This is common when using adhesives like hairspray or glue sticks, or filaments that leave a sticky residue. Regular cleaning is crucial to avoid it interfering with adhesion in future prints.
- Issues with Print Adhesion: If your prints start to detach mid-print or fail to stick properly from the beginning, the bed may need cleaning. Dust, oils from handling, or leftover filament can disrupt the adhesion process.
- Frequent Printing with Difficult-to-Remove Filaments: Materials like ABS, TPU, or carbon fiber often leave stubborn residues on the bed. If you’re using such filaments often, you’ll need to clean the bed more frequently to maintain good adhesion.
- Visible Marks or Discoloration: Over time, your bed might show visible marks or discoloration, especially on materials like PEI or glass. These signs suggest the bed is carrying residual material or filaments that could affect adhesion.
Frequency Guidelines
How often you clean the bed depends on your printing volume and the types of materials you use:
- After Every Print: For industrial-grade printers with high throughput or when working with challenging filaments, cleaning after every print ensures the bed remains in top condition.
- Every 5-10 Prints: For moderate usage or when printing with easy-to-remove filaments like PLA, cleaning every 5 to 10 prints is often sufficient.
- As Needed: If you notice any of the above indicators (residue, adhesion issues, discoloration), it’s time to clean your bed, even if you’ve printed only a few parts.
By staying on top of these cleaning habits, you’ll ensure optimal adhesion and consistent print quality, improving the efficiency of your 3D printing process and extending the life of your printer bed.
How To Clean 3D Printer Bed in 7 Steps?
Step 1: Gather Your Cleaning Supplies
Before you start, make sure you have everything you need for the job. Here’s what you’ll need to ensure an effective and smooth cleaning process:
- Isopropyl alcohol (IPA): A must for removing oils, dirt, and residue. Use at least 70% concentration for better cleaning power.
- Lint-free cloth or paper towels: These are perfect for wiping the surface without leaving behind fibers or residue.
- Plastic scraper or spatula: To gently remove any stuck debris or old material from the bed.
- Brush (optional): A soft brush can help remove dust or small particles before wiping down the surface.
- Gloves (optional): Prevents oils from your fingers from contaminating the bed during cleaning.
Having the right tools on hand ensures you won’t have to stop midway through the process. Plus, it saves time by making sure your bed gets properly cleaned with minimal hassle.
Step 2: Power Off And Cool Down Your Printer
Before you dive into cleaning, ensure your printer is turned off and the bed is completely cool. Never clean a hot bed—it can be dangerous and might damage the bed surface.
Turning off your printer not only ensures your safety, but it also prevents any accidental movements that could damage the bed or cause misalignment during cleaning. Allow the bed to cool down for at least 15–20 minutes, depending on the material used. This ensures it’s safe to work on and prevents any heat-related warping while cleaning.
Once the bed is cool and safe to touch, you’re ready to start cleaning without worrying about burns or other hazards!
Step 3: Remove Any Excess Material
Now, let’s get rid of any leftover filament or debris on the bed. Start by gently scraping off the larger chunks of material using a plastic scraper or spatula. A metal tool may damage the bed surface, so stick to something softer, like plastic or silicone.
Pay extra attention to corners and edges where material tends to collect. Don’t force the scraper if the material isn’t coming off easily. Instead, let the bed cool down a bit more or apply a bit of gentle pressure to dislodge stubborn bits.
Once you’ve removed the large pieces, use a soft brush or a lint-free cloth to pick up any fine debris. This ensures the surface is completely clear of anything that could interfere with the adhesion of your next print.
Step 4: Clean With Isopropyl Alcohol (IPA)
Next, grab some isopropyl alcohol (IPA) — it’s one of the most effective ways to remove oils, residue, and stubborn contaminants from the bed. Dampen a lint-free cloth or paper towel with IPA (aim for at least 70% concentration for best results).
Gently wipe down the entire bed surface, ensuring you cover all areas, especially where print material might have stuck. The IPA will help dissolve any remaining adhesive or grease that’s built up over time, leaving the bed fresh and ready for your next print.
Pro tip: For build plates that are more prone to residue (like PEI or textured surfaces), using a non-abrasive pad with IPA can help avoid damage while still getting a deep clean.
Step 5: Dry And Inspect The Surface
Once you’ve wiped down the bed with IPA, take a clean, dry cloth or paper towel and gently buff the surface to remove any remaining moisture. It’s important to ensure that the bed is completely dry before proceeding, as even a small amount of residue can interfere with print adhesion.
Inspect the bed carefully—check for any leftover debris, scratches, or dents. If there’s any damage, it may affect the quality of your prints, so consider replacing the bed if necessary. A smooth, clean, and intact surface is key to optimal adhesion for your next project.
Pro tip: A quick check with your hand can reveal any remaining oils or dirt, as they may leave a slight residue you can feel. Keep the bed in its best condition to maximize the efficiency of your 3D printing process.
Step 6: Apply Adhesion Aid (If Necessary)
If your prints have been struggling with adhesion, applying an adhesion aid may be the solution. Depending on the material and printer type, using a specialized adhesive spray, glue stick, or build surface can give your 3D prints the extra grip they need.
Here’s a quick rundown of popular options:
- Adhesive Spray: Quick and easy, works well with most materials.
- Glue Stick: A simple and cost-effective solution, perfect for PLA and ABS.
- Build Surface: Consider upgrading to a PEI sheet or Kapton tape for a durable, long-lasting surface.
Remember to apply the aid evenly in a thin layer and let it dry if required. The goal is not to over-saturate the bed but to provide just enough adhesion for a clean, strong print.
Step 7: Calibrate The Print Bed
Proper bed calibration is critical for achieving optimal adhesion and preventing print failures. If your printer’s bed isn’t level or the nozzle height is off, even the best cleaning and prep won’t guarantee a good print.
Here’s how to calibrate it:
- Home the Printer: Start by moving the print head to its home position.
- Check the Nozzle Height: Place a piece of paper between the nozzle and the bed. Adjust the bed height so the paper slides with slight resistance.
- Run a Test Print: After adjusting, run a small test print to check the first layer’s adhesion. If the nozzle is too high, the filament won’t stick. If it’s too low, the bed could be damaged.
Regular calibration ensures consistent prints and better adhesion over time, saving you from headaches later.
Best Practices To Prevent Build-Up And Improve Adhesion
To keep your 3D printer bed in top condition and improve adhesion, follow these best practices:
- Use Adhesives Wisely: Adhesives like glue sticks or hairspray can help improve print adhesion, but use them sparingly. Apply a thin, even layer to avoid excessive residue. Use glue sticks for PLA prints, hairspray for ABS, and PEI sheets for a wide range of materials. This ensures a smooth surface for prints without clogging the bed with too much adhesive build-up.
Adhesion Aid | Best For | Description |
Glue Stick | PLA | Provides a smooth, even coating for excellent adhesion. |
Blue Painter’s Tape | PLA, PETG | Creates a slightly textured surface, promoting better adhesion and easy part removal. |
Hairspray | ABS | Provides a sticky surface for prints to adhere to, especially useful for ABS. |
PEI Sheets | A wide range of materials | Durable, reusable, and provides great adhesion for various materials. |
- Regular Inspections: It’s important to check the bed surface periodically. Look for signs of wear, adhesion issues, or leftover material. Doing this between prints helps identify problems early before they affect your print quality. A quick inspection can save you time by preventing failed prints later.
- Adjust Printer Settings: Fine-tuning your printer settings, like adjusting the bed temperature or first-layer speed, can significantly improve adhesion. A slightly higher bed temperature can help some filaments stick better, while slower first-layer speeds give the filament more time to bond. These small adjustments make a big difference in print success and reduce the need for excessive cleaning.
- Use Protective Coatings: For industrial applications, investing in protective coatings such as PEI sheets can prolong the life of your bed and reduce cleaning frequency. These durable surfaces are easy to maintain and provide consistent adhesion, allowing you to focus more on printing and less on cleaning.
By following these practices, you’ll maintain a clean, smooth, and well-calibrated printer bed, ensuring every print sticks perfectly and reducing downtime spent on cleaning and maintenance.
Keep Your 3D Printer Performing At Its Best With A Clean Bed
Maintaining a clean 3D printer bed is key to achieving optimal print quality and efficiency. A clean bed ensures better adhesion, reduces print failures, and minimizes material wastage, all of which contribute to streamlined operations. Regular cleaning as part of your maintenance routine will extend your equipment’s lifespan and enhance performance.
By committing to consistent bed maintenance, you can improve print quality, reduce downtime, and boost productivity. Whether transitioning traditional parts to additive manufacturing or exploring new materials, a clean bed is essential for optimal results.
For tailored advice and expert support on bed cleaning solutions or printer maintenance, Additive Plus is here to help. As an innovative industrial integrator with over a decade of experience, we specialize in helping clients seamlessly integrate 3D technologies into their operations. From our 3D printing laboratory in Los Angeles to our offices in California and Indiana, we offer a full spectrum of services, including equipment supply, facility design, consulting, and flexible financial solutions.
Get a personalized quote today to keep your 3D printing operations running at their best.
For more insights into 3D printing maintenance, industry trends, and in-depth guides, you can explore 3Dnatives, a leading source for 3D printing news and resources. Whether you’re a beginner or an expert, their platform provides valuable information on the latest technologies, materials, and best practices to optimize your 3D printing workflow. Stay updated and enhance your knowledge with expert articles, product reviews, and industry news.
FAQ
How to remove 3D print from bed without damaging it?
To safely remove a 3D print from the bed, start by allowing it to cool down to avoid warping. You can then use a spatula or a scraper to gently pry the print off. For stubborn prints, you can try applying a small amount of isopropyl alcohol around the edges to loosen the adhesion.
What is the best method to clean 3D print bed?
To clean your 3D printer bed, use isopropyl alcohol (IPA) on a lint-free cloth to remove residue and oil. For tougher build-up, you may need to use a soft abrasive pad or scraper, but be sure to avoid using harsh chemicals that could damage the bed surface.
How to level 3D printer bed correctly for better prints?
Proper bed leveling ensures your prints stick well and have consistent adhesion. To level a 3D printer bed, use the manual or auto-leveling feature (depending on your printer model). Adjust the bed height at each corner to ensure the nozzle is at the right distance from the bed — typically the thickness of a piece of paper.
How to level a 3D printer bed without a leveling probe?
If your 3D printer doesn’t have an auto-leveling probe, you can level the bed manually. Start by heating the bed and the nozzle to your printing temperatures. Use a piece of paper to check the distance between the nozzle and the bed at each corner, adjusting the screws on the bed until you achieve the right clearance.
How often should I clean my 3D print bed?
The frequency of cleaning depends on how often you print and the materials used. As a general rule, it’s best to clean the print bed after every few prints or when you notice poor adhesion or material residue.
Can I use water to clean my 3D printer bed?
While water can be used to clean the print bed, it’s important to dry the bed thoroughly afterward to prevent any moisture from affecting the next print. For most efficient cleaning, use isopropyl alcohol, as it evaporates quickly and leaves no residue.
Should I level the 3D printer bed every time I print?
While it’s not necessary to level the bed before every print, it’s a good idea to check the bed leveling periodically. If your prints are showing signs of poor adhesion or uneven layers, it might be time to recheck the bed level.
What happens if my 3D printer bed isn’t leveled properly?
If your bed isn’t leveled properly, you may experience poor print adhesion, warping, or uneven extrusion. This can lead to failed prints, so it’s crucial to ensure the bed is leveled correctly for the best results.
Explore What’s New in 3D Printing
Transforming Golf Gear with Farsoon 3D Printing: Tees, Ball Markers, and Irons
How Atomization Technology Is Transforming Metal Powder Production
FGF 3D Printing in Furniture Design: Sustainable, Custom, and Stylish Solutions
What Material Is Used for 3D Printing? A Complete Guide to 3D Printing Materials
Related Posts
1. Introduction Additive manufacturing, commonly known as 3D printing, has fundamentally transformed modern product development,…
Metal additive manufacturing has fundamentally transformed the way industries approach design and production, enabling the…
Imagine a manufacturing process capable of producing parts measured in meters, not millimeters—components so vast…
Why Clean Your 3D Printer Bed?Understanding The Different Bed Types And MaterialsWhen Should You Clean…
Ashkhen Ovsepyan
Additive manufacturing expert and tech business leader, focused on global strategy, innovation, and advancing women in 3D printing.